Lesson 2: How to Use the Handoff Feature
Learn how to use ProtoPie's Handoff feature for handing over interaction specifications to your developers.


Welcome to the second installment of ProtoPie School, where we quickly get you up and running with ProtoPie. This article will cover a great ProtoPie feature called Handoff(previously called Interaction Recipes).
What you'll need
ProtoPie has made this feature more accessible to designers by allowing up to one interaction recording for Basic and Free plan users. Once you subscribe to the Pro or Enterprise plan, you can record and share unlimited recordings with your team.
You can use any Pie you like, but if you want to follow along with me, you can use this one:
What you'll learn
By the end of this tutorial, you'll know how to:
- Upload a Pie to a Team space
- Record an interaction recording
- Review the interaction recording
- Share the interaction recording with your team
Time to complete: ≤15 minutes
What is the ProtoPie Handoff feature?
The ProtoPie Handoff feature bridges the gap between design and development, ensuring your interactions are faithfully translated into code.
With Handoff, you can create an interaction recording that showcases user flows, element behaviors, and interactions in your prototype. An interaction recording goes beyond a simple handoff—it's a fully interactive specification, complete with a scrubbable timeline, easing parameters, start and end properties, and precise timings. This eliminates guesswork, giving developers a clear, frame-by-frame guide to your intended design.
Step 1: Upload your Pie to ProtoPie Cloud
- Open the Pie in ProtoPie Studio.
- Click the Handoff icon in the upper right corner of Studio's interface.
- Select either a Team Space or Personal Space to save your Pie in ProtoPie Cloud. The interaction recording will be saved in the same place.

- Once the upload is complete, you will be taken to the Pie cloud page.
Step 2: Record your interaction
- Look for the Handoff button on the right-top side of the cloud page.
- Click the Record button to start recording.
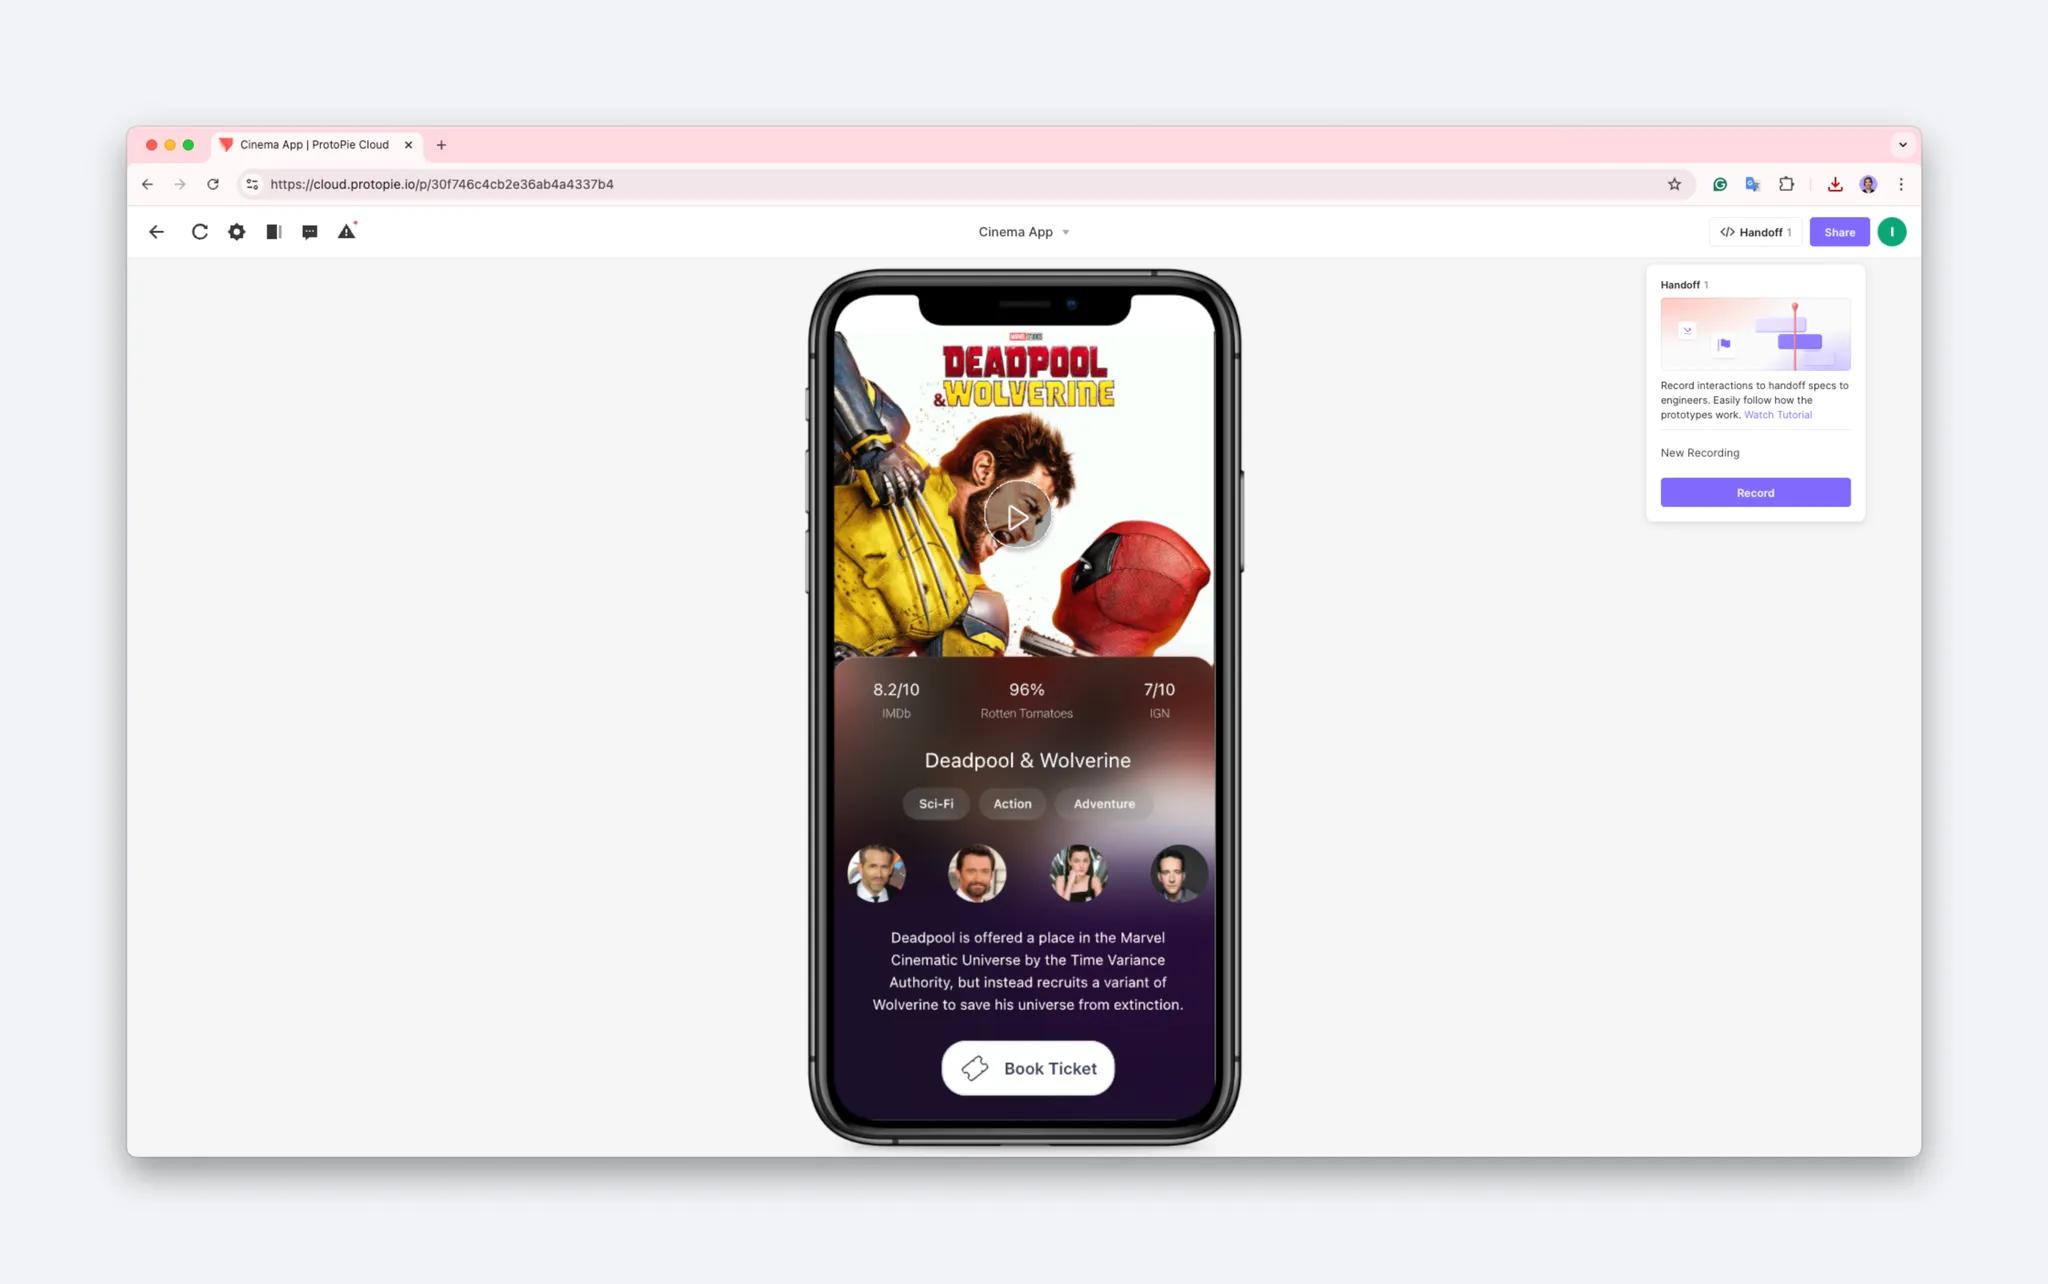
- Interact with your Pie showcasing the specific interactions you'd like to hand off to your engineering team. When you're done, click the Stop button at the top of the page.
- Your interaction recording will be saved as ‘New Recording’ by default. You can rename it from the Handoff menu by clicking the Pencil icon.

That's it! In just a few seconds, you've created your first interaction recording.
Step 3: Review your interaction recording
- After you stop recording, you'll be able to review your recording. An interaction recording consists of a timeline of everything you recorded and a visual preview of your Pie that updates in sync with the timeline.
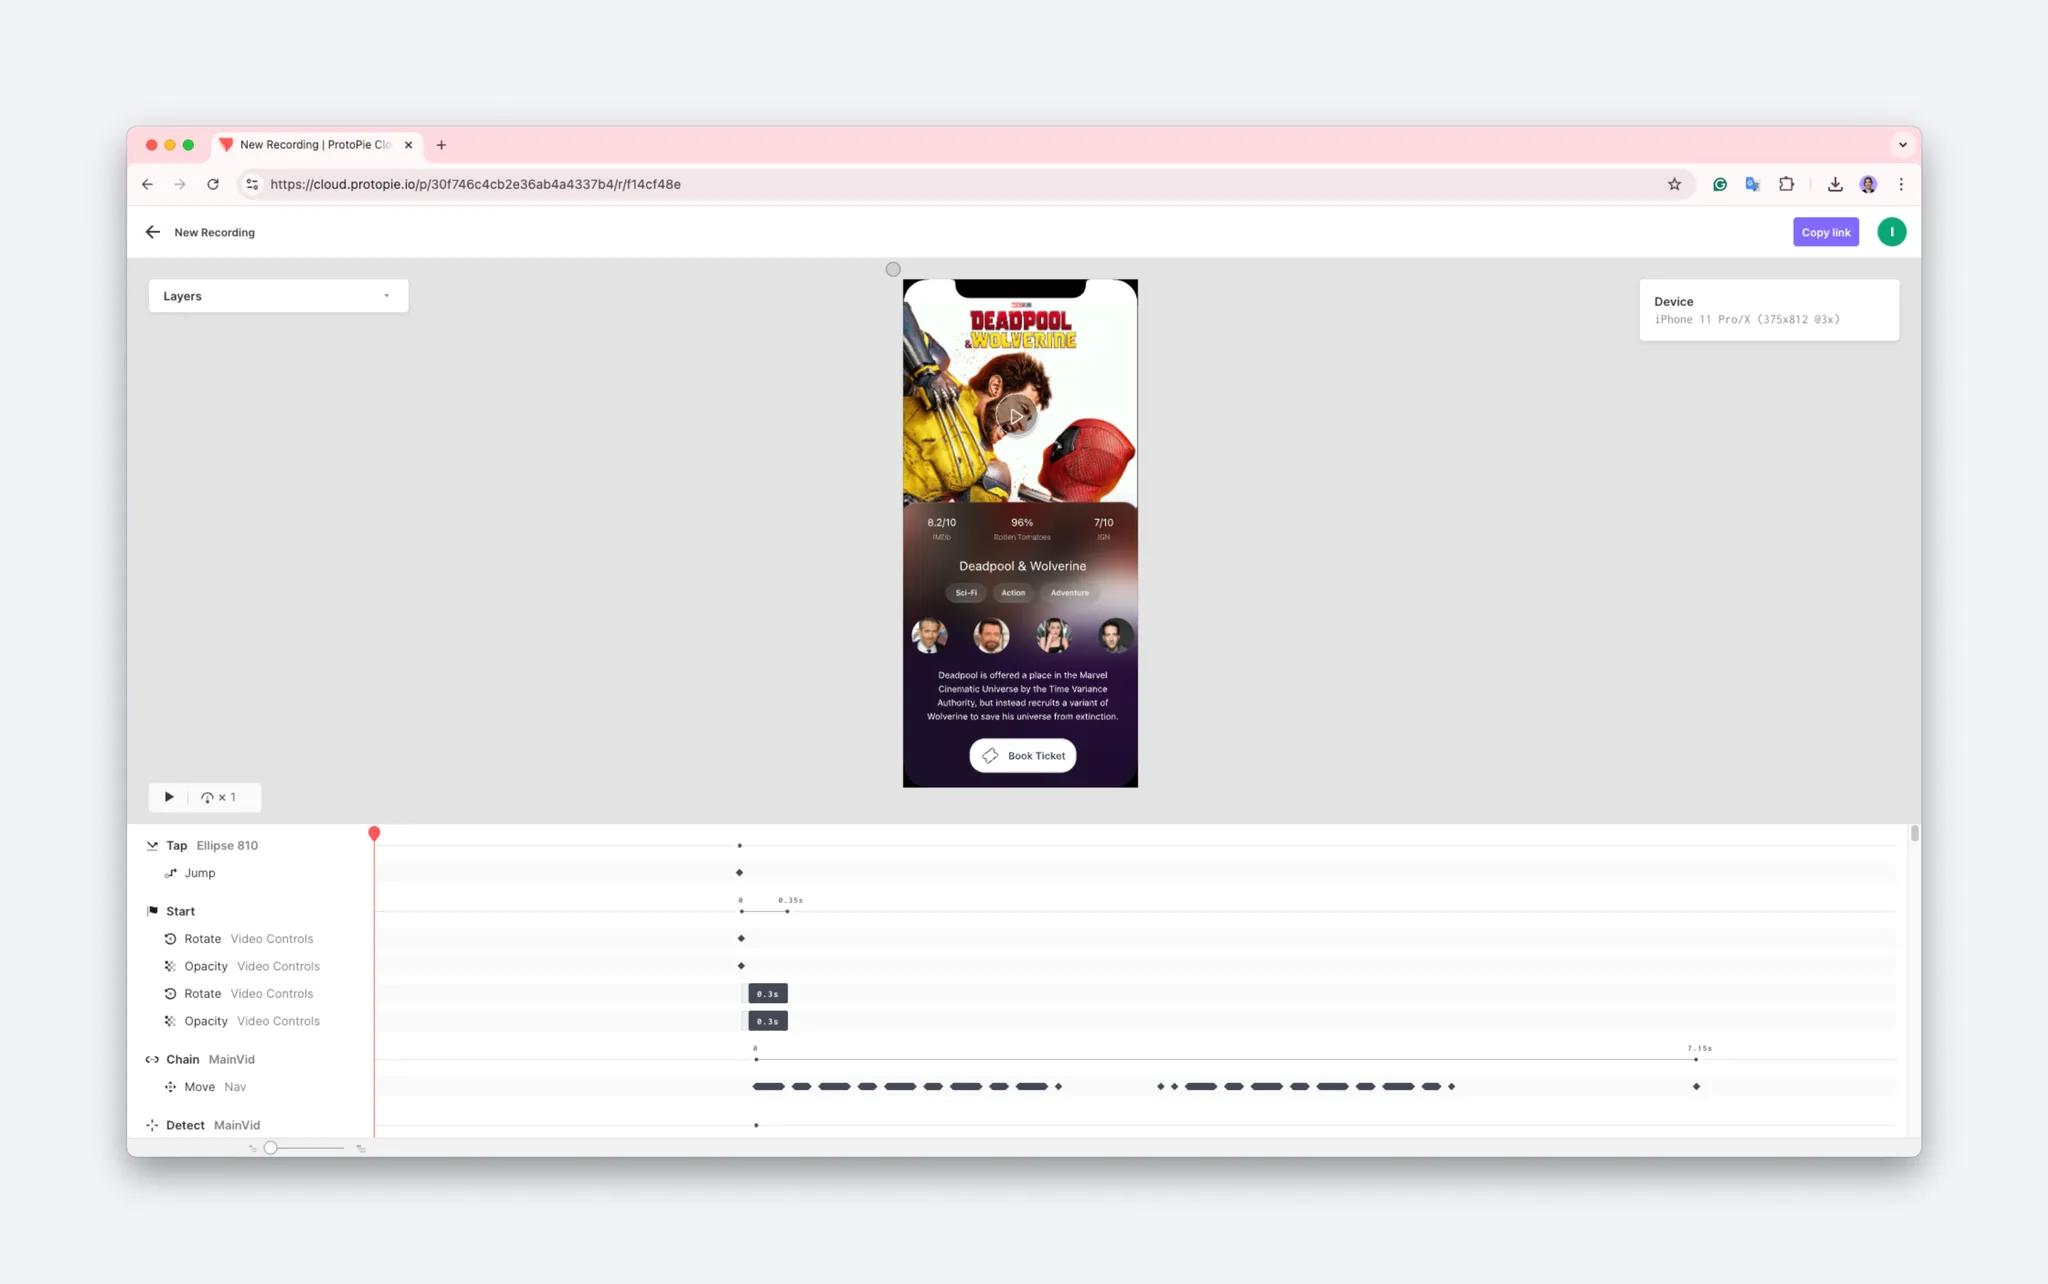
- Your interactions on the timeline are grouped into Triggers and Responses, just the same way you see them in Studio.

💡 Some things you can do:
- Scrub through the animation: Drag the red upside-down teardrop control — this is the play head — right and left. This will allow you to scrub through the interaction you just recorded frame-by-frame.
- Play the animation back at different speeds: You can make the animation playback faster or slower. Click the playback speed icon and choose a playback speed. Then click the
Playicon to start the animation — it will change to aPauseicon allowing you to stop playback. Playback will resume from the playhead's current position. You can reposition the playhead at any time while the interaction is playing, either by dragging it or clicking in the top bar of the timeline. - Resize the interface: You can make the timeline taller or shorter by dragging the division between the preview and the timeline.
- Inspect the animation of a particular Response: Click on any Response in the timeline, and an inspector window pops up on the upper right side of the screen. These show the exact values of properties at the start and end points of your animation, the animation curve easing parameters, as well as the "current" value of the particular property you are inspecting. The current value updates in real time, in sync with the playhead.

- Inspect a particular Layer: The Layers stack is available to the left of the preview. If you click on any layer, the inspector window on the right updates to show its properties in real time, in sync with the play head.

Step 4: Share your interaction recording
Lastly, you'll want to share the interaction recording with your team. You have two ways to do this:
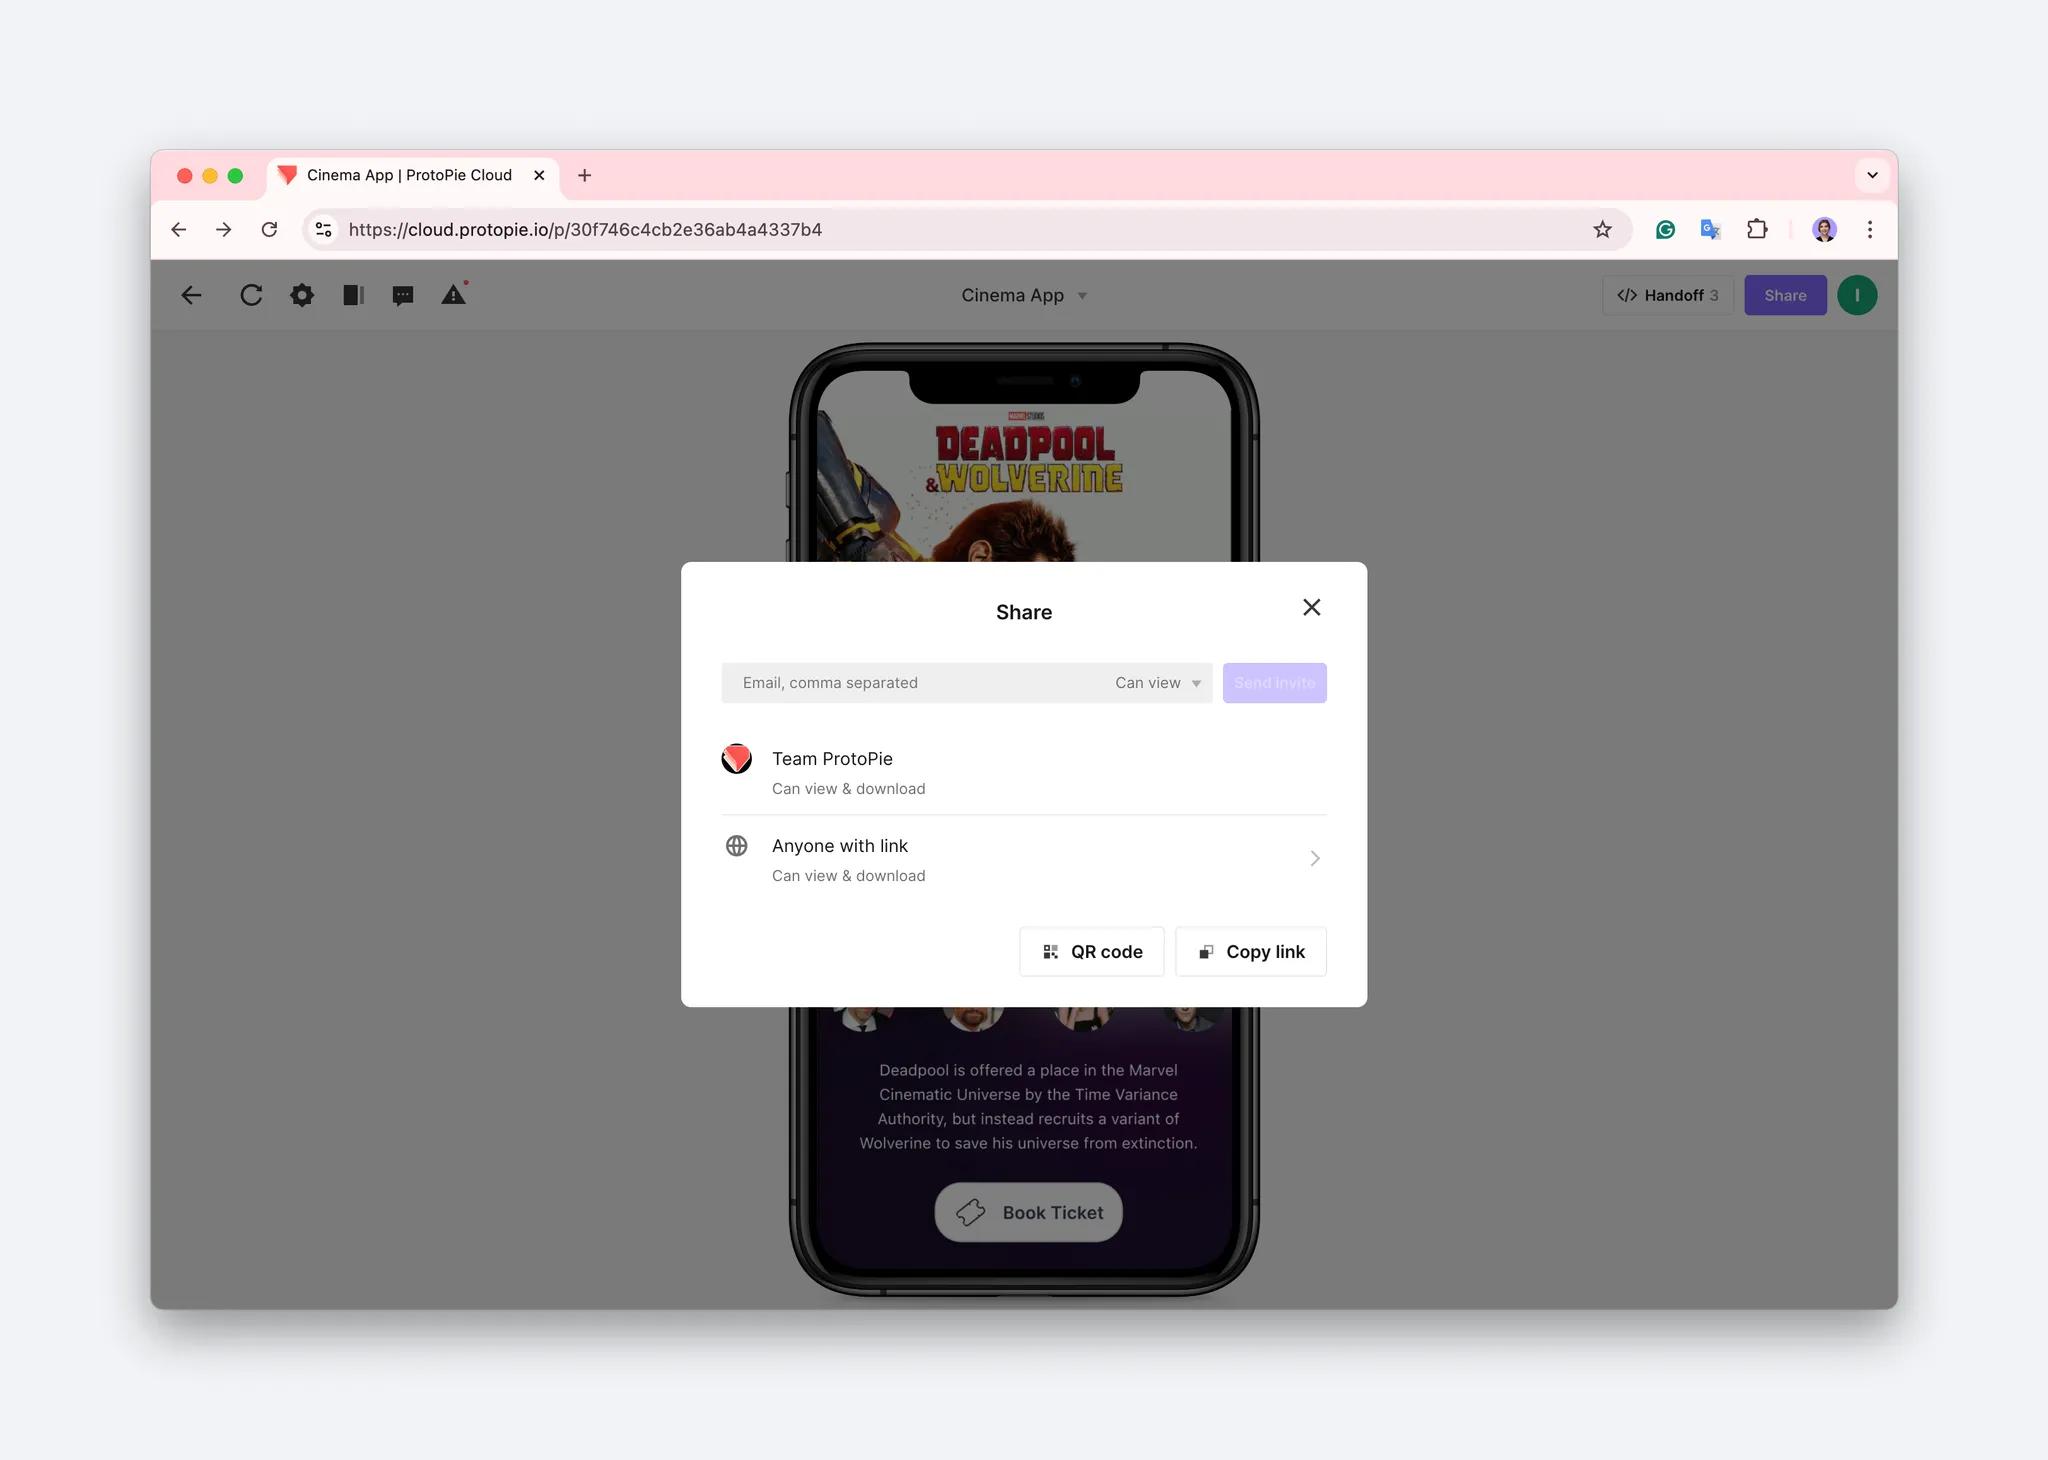
- Share the Cloud link for the entire Pie. Anyone with this link can access all interaction recordings created for this Pie by clicking the Handoff button. To share the cloud Pie link, click the purple Share button, configure sharing options, and then click Copy link.
- Share a direct link to a specific recording. Go to the Pie Cloud page, click the Handoff button, and choose the interaction recording you want to share from the list. Click on it to open the recording page. You can then copy the link from the address bar or by clicking the "Copy link" button and share it with your team.

Tips about ProtoPie interaction recordings
- Your interaction recordings are protected by the same access settings as the Pie. You can modify these settings by clicking the Share button on the Pie page.
- When you make an interaction recording, the recording does not update to reflect any new changes to the Pie you upload to ProtoPie Cloud. It represents that particular version of your Pie at the point you recorded it. So, if the changes you have made affect a particular recording, you'll want to record a new one and share that with anyone involved. Your old one won't be removed automatically — it will appear listed alongside any new one you create. So you might want to get into a habit of including the date you recorded it in the name of the recording, something like this:

- Of course, you don't need to keep the old one. You can always delete it if it helps keep things better organized. But be aware: once you delete a recording, it's gone for good. There's no way to recover it.
In just a few minutes, you've learned to use ProtoPie's Handoff feature to create fully interactive specifications for your prototypes to share with your development team.

-Interaction-libraries.jpg?fm=webp)
